DARING BAKER'S CHALLENGE #7

Jun 30, 2010

The June 2010 Daring Bakers’ challenge was hosted by Dawn of Doable and Delicious. Dawn challenged the Daring Bakers’ to make Chocolate Pavlovas and Chocolate Mascarpone Mousse. The challenge recipe is based on a recipe from the book Chocolate Epiphany by Francois Payard

 This month's challenge was TOTALLY AWESOME.
Chocolate Pavlova with Chocolate Mascarpone Mousse.
Could anything sound more extravagantly lush than THAT?


Since I was too lazy to complete the challenge earlier in the month one of my closest friends, Shekinah, was turning 18 on the 24th, I made the pavlova quite late. I thought that being the stingy-poker that I was since there wouldn't be too many of us celebrating (it was a small dinner celebration at this TO DIE FOR steamboat place) I would make half the recipe. I had it all figured out, I'd make all the components the day before and assemble them in the morning before leaving for her house. The mousse and mascarpone cream didn't give me any trouble, but I probably should have remembered it was my VERY FIRST pavlova, and there were BOUND to be hiccups along the way.
And a hiccup there was.
A BIG one.

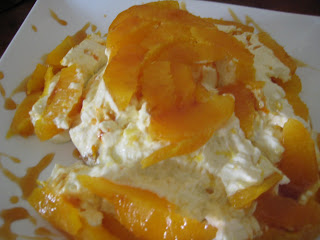
THAT my good readers, was what the pavlova looked like the next morning. I could BARELY get it off the baking paper, and the parts that DID peel off cracked and crumbled to bits. Looking  back, I probably should have baked it for longer to allow the pav to dry out more. Truth be told though, I was actually quite happy it didn't turn out. It looked a bit TOO SMALL to be given as a present. So, I scrapped it, and tried again. This time making the full meringue recipe. As for the one above, I didn't want to waste it (It tasted REALLY GOOD) So I crumbled it up even more and made 2 little parfaits.
Quite decent, no? And SO YUMMY MY GAWD!!
Anyways, after quickly putting together the stuff for the 2nd meringue (luckily I still had a decent amount of time on my hands) and baking it for 2 and 1/4 hours, I got a BE-YOU-TI-FUL looking pavlova.
I thought about it, and decided to add the finishing touches at her place. So I packed the mousse and cream into piping bags and took the lot to Kynah's house. We had a good long gossip (haven't seen her since she started college) Had a shower, got dressed and dressed the pavlova so it was ready for dinner.
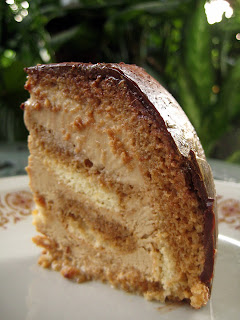
Doesn't it look ADORABLE? I cheated a bit and bought to sugar roses, so the whole thing was dead easy to put together. Kynah and her parents oohed and ahhed over it, the we packed the pav up and headed to the restaurant.

This is where things got a little messy. The pavlova was sitting next to the HOT steamboat stove for about 15 minutes before we thought of moving it to a chair so it would be away from the heat. AND it was about 2 hours (the steamboat was REALLY GOOD,k?) before we got around to eating it. So by the time the pavlova came out of the box....
Let's just say it tasted a lot better than it looked.
Honestly. However, all said and done Kynah LOVED IT.
She thought it was fantastic (and quite frankly, it bloody was). I'll definitely be making this again. Although, I'll probably not subject it to heat next time!
As usual, if you'd like to try the recipe for yourself, it'll be found on The Daring Kitchen's website
And do try to go through the blogroll to see what other Daring bakers thought of the challenge. Bye!
DARING BAKER'S CHALLENGE #6

May 27, 2010

The May 2010 Daring Bakers’ challenge was hosted by Cat of Little Miss Cupcake. Cat challenged everyone to make a piece montée, or croquembouche, based on recipes from Peter Kump’s Baking School in Manhattan and Nick Malgieri.

Hello, it's that time of month again!
I was really really REALLY stoked  when I found out what this months challenge was. Been wanting to make a croquembouche for a couple of YEARS now, but never plucked up the kahoonas to try. Another upside to the Daring Bakers, I guess I'm a wee bit more Gryffindor than I thought I was. ;-)


Alright, for those who are out of the loop, a piece montée, or croquembouche is a tower of creampuffs held together by a glaze, usually chocolate or caramel. People in France traditionally make this instead of the usual wedding cake. A professional one is supposed to look like this :

Ok, so mine didn't quite turn out as a tower.
More like a lopsided molehill really.
I made only half the recipe, because there aren't too many people at home and there was NO WAY a full sized croquembouche  was going to be finished, especially considering that this dessert has to be served ASAP. I filled the cream puffs with a coffee pastry cream and for the glaze I used caramel. It looked really pretty up close, but was really difficult to eat. The caramel made it almost impossible to pick an individual cream puff off without either:
a) ripping it in half, OR
b) ripping its immediate downstairs neighbour in half.
I think my pastry cream was a bit too sweet too, would cut down the sugar next time I do this. The best part about making the piece montée was the caramel strands surrounding the cream puffs. Sure, I got burnt a couple of times (OUCH, by the way) but that didn't stop me from flicking sugar like mad all over the thing.
and on myself.
and the kitchen table.
and the floor.
and maybe a little on my kitchen scale.

All in all, I had fun with this challenge. It may have seemed overwhelming in the beginning, but once I broke it down, it was a relatively enjoyable task. Albeit a rather long one. It you'd like to try to make this ( and you should. It's one of those things everyone should try before we get sent off to that big bakery in the sky ) then the recipe and instructions are here on the Daring Kitchen website.
Also, try to check out the creations of the other Daring Bakers on the blogroll. There are some that'll blow your mind!
Till next time, Ciao!

DARING BAKER'S CHALLENGE #5

May 4, 2010

The April 2010 Daring Bakers’ challenge was hosted by Esther of The Lilac Kitchen. She challenged everyone to make a traditional British pudding using, if possible, a very traditional British ingredient: suet.


Boy am I LATE huh?
*brushes dust off blog*
Sorry bout that folks, I couldn't find my pictures until 2 days ago (they were still in my camera). But all hiccups aside, atleast I'm FINALLY posting, right?


So, let's get started.  Steamed English Pudding. This is going to be quite a short post, cause I don't really have much to say about it. The challenge was easy enough but quite frankly we weren't too nuts about it, infact the pudding was still sitting in the fridge 3 weeks after I made it. It tasted a bit odd really, but then again that's probably the recipes fault. I did like steaming the pudding, it came out nice and moist and a little spongy too. wasn't too hard to do either, but that's probably cause I have an actual steamer. I used chinese bowls to steam the sponges in, so they came out in really cute domes. As for using suet, the only one I could find was made from beef and due to religious issues, that's a bit of a no no for me. I used shortening instead. Also, for the fruit I threw in a little something special. For the past 4 months, I've had a container of fruitsoaking in brandy in my fridge. And when I say soaking, I mean SOAKING. I don't even remember what fruit I have in there anymore, but I do know it smells strong. Funnily enough, the pudding didn't taste very alcohol-ly when it was done. I served the cooked pudding with custard sauce on top. On the whole, a very -meh- tasting challenge. I will do it again, but I'll be wanting a different recipe to use. I have NO IDEA where this one came from ( I was searching and printing out a lot, OK?), Heck, I don't even remember what it's CALLED. So if anyone DOES know, just give me a shout. :-)
                                    
~ 90g self raising flour
~ pinch of salt
~ 90g breadcrumbs
~ 90g shreaded suet (again, I used shortening)
~ 90g raisins
~ 160g currants
~ 30g candied peel
~ 60g brown sugar
~ 1 egg
~ 6tbsp milk

Mix everything together, divide into molds and steam for 1 and a 1/2 - 2 hours. (OMG this has got to be the SHORTEST set of instructions I've EVER written on this blog.)

Please head on down to the Daring Bakers blogroll to check out what the others have done. It'll look pretty damn amazing! => http://thedaringkitchen.com/blogroll/bakers

DARING BAKERS CHALLENGE #4

Mar 28, 2010

The 2010 March Daring Baker’s challenge was hosted by Jennifer of Chocolate Shavings. She chose Orange Tian as the challenge for this month, a dessert based on a recipe from Alain Ducasse’s Cooking School in Paris.

 I learnt something new this month. Thanks to Jennifer, I now know what a 'tian' is. What? Never heard of em'?
You can thank wisegeek.com later :
Well known in some cultures as a prepared dish with layered ingredients, the tian can be thought of as a casserole with a specific arrangement of components. From this perspective, a tian can be a hot or a cold dish.

So, an orange tian.....


Frankly I was a little sceptical. I mean, it looked like a lot of work for whipped cream piled on top of a piece of shortbread then topped with fruit. But I'm glad I made it all the same. It was a very light dessert, and because I reduced the sugar, it wasn't too sweet either. I decided to make it family-sized just to make life easier for me. So, down to business then. There were 5 components to this dessert, as broken up below.


~Pate Sablee
From what I gather this is basically like shortbread....or, atleast it's suppossed to be. I'm not sure where I went wrong but it came out cake-like and VERY crumbly. I made the recipe twice and had the same result both times....any ideas? Not to say it wasn't good though, it was like a cross between a butter cake and shortbread. My dog agrees too, judging from the way she gobbled up the first batch. Very yummy.


~Marmalade
Again, not too much trouble. It came together fine and tasted a little tangy. The one thing I SHOULD have done, was blend the blanched oranges to make it finer, but I didn't want to wash the blender later (SO ANNOYING) so I just minced it all by hand. The resulting marmalade was a little chunky, but I didn't really mind, it still tasted good.


~Orange Sements <3
OMG. I LOVE segmenting oranges!!! It's like......so totally ZEN!! I'm not joking, you could put me in a corner with a bowl of oranges and order me to segment them, and I would be HAPPY. I don't know WHAT it is, but I was having so much fun, it was actually a little dissapointing when all the oranges were done. Anybody in Malaysia need an orange segmented? Pretty please??

~Caramel
Now THIIIISSS..... was a little bit funky. Again, not too sure where  messed up, but it turned out tasting bitter. And the thing is, the caramel was JUST STARTING to colour when I added the orange juice (And boy did that start to sputter. I feared for my life, I kid you not). Didn't think too much of it and just went ahead with the rest of the recipe. Could hardly taste anything bitter in he finished dessert, so YAY!


~Whipped Cream
Listen.
If after 5 years of blowing up stuff in the kitchen I didn't know how to whip cream,
I would just shoot myself.
I really would.
But now I know how to stabilize my cream. All you have to do is whip in a bit of gelatine and the cream won't collapse so fast. However, I really don't like the smell of gelatine, so I'll try out something else. Maybe unflavoured konyaku jelly powder?


So with all the stuff prepared, I was ready to assemble the Tian. And again, I dissobeyed the first rule of Bakingdom. Again. Because I didn't read the instructions, I didn't notice we were supposed to DRAIN the orange slices (That had been sitting in caramel overnight) on paper towels.
Oops no.1
Luckily I wrapped my tin in alluminium foil. If I hadn't, the tin would have leaked wattery orange caramel all over the kitchen.
 Ah well, lesson learnt. I moved on and piled on the whipped cream, then proceeded to place the pate sablee on top. Problem was, the biscuit broke clean into 2.
Oops no.2
Nevermind, I thought to myself. It's at the bottom, no one will notice. So brushing the crumbs off the kitchen table, I set the Tian in the fridge to set for 1/2 an hour.
Oops no.3
I barely had time to drizzle the remainder caramel sauce over it and take a picture.This is what it looked like 5 minutes after taking it out of the fridge:


Not pretty.
I didn't get a chance to take cross section picture, which was a pity cause I bet that would've looked really nice.It's alright though, the shot of the whole thing came out pretty all the same. Next time, I'll just
make individual portions.


If you'd like to try this recipe out for yourself, just follow the link and it'll take you to the daring kitchen 'Orange Tian' page. => 
http://thedaringkitchen.com/recipe/orange-tian

Have fun, and happy baking!

Chocolate MOOOOOOOOOOUSSSSEEEE.....

Mar 19, 2010

I love that :
1) This recipe is SUPER easy.
2) It has very few ingredients (practically FOUR if you wanna skip the fruit and liquor)
3) It's non-bake ( for those days you just CANNOT set up the oven )
4) It's so ORGASMICLY GOOD. I can't even begin to tell you.

Just make it.
Then eat and weep.

Chocolate Mousse
by Alec Kearns of Glebe Point Diner
~300g dark chocolate, chopped
~9 eggs, seperated
~2tbsp brandy (opt)
~30g castor sugar
  *my addition
*5 tbsp sugar
*8 ripe bananas, sliced


Melt the dark chocolate over a double boiler and whisk in egg yolks and liquor (if using). If mixture become very stiff, add 1 tbsp water to loosen it. Whisk eggs whites to soft peaks, then gradually adding sugar whisk to stiff peaks. Fold egg whites into chocolate mixture in three batches till combined. Divide among 8 X 250ml glasses and refridgerate 3-4 hours till set.

*caramelized banana topping
Melt 1 tbsp of sugar in heavy bottom saucepan and cook till very light golden colour. Add sliced bananas and stir to coat. Top mousses and refridgerate to set.

The original recipe called for rasberries macerated in balsamic vineger. I opted out and used the caramelized bananas instead and removed the brandy element too. I also made only 1/3 of the recipe, as there weren't too many people at home to eat it ( although, I SUPPOSED I could have FORCED myself to polish off a full recipe on my own. You know, if  ABSOLUTELY had to)

Oh, and don't worry. This is a healthy dessert.
It's got whole eggs in it, that's protein.
And chocolate, so that's your antioxidants.
;-)
*recipe courtesy of Vougue Australia, Entertaining and Travel.

MIB classes, babysteps 1-6

Mar 12, 2010


I know I'm bad at updating things, but this is getting ridiculous.
I've had 6 lessons at MIB now.
Each class is about 3.5-4 hours.
Thus I've spent ATLEAST 21 hours there.
21 hours.
21 hours of  learning wonderful things about food and baking.
and I haven't blogged a SINGLE word of it.
Shame on me, really.

Especially considering I have SOOOOO much to share! Well, not really much, just one tip really.
But if you've been making bread without a bread maker in a hot country a.k.a Malaysia (and IF you have, give yourself a pat on the back) this tip will revolutionize your ENTIRE perspective on bread making.
THIS.
WILL.
CHANGE.
YOUR.
LIFE.


Did you know that we're ( 'WE' meaning people in tropical countries with really hot climates) are supposed to make bread with.........get ready for this.......this'll flip your lid........we're supposed to make bread.... with.... COLD water.

I know, I know, boggles the mind doesn't it?
After AAAAAALLLLL the propaganda fed to us by lying, thieving American and British cookbook authors the world over. I'll bet they were thinking, "ok, we can't slow down their economic growth, but we can be sure they'll be making bread WRONG!!! "

Yesyesyes, you can argue that they're actually writing for an American / Europian audience. You can also argue that they're suiting their own temperatures......but I think my theory's more interesting. Not that I don't absolutely ADORE my fellow Caucasian earth dwellers of course!

I've also been learning all this stuff about molding, forming, and shaping bread, as well as getting to know the Science behind making it. It's ALOT of fun, and I look forward to my classes all the time. Although, I have to admit I'm getting a little sick of bread, and it doesn't help I have a freezer FULL off the stuff too. Here's some shots of some of the stuff we've been doing. I'll try to take more pictures, but usually by the time I get home, I'm so tired I can barely LIFT my camera, let alone photograph anything. :-)


Oh, by the way, 5A's and 5B's for SPM. Not too bad huh? :-)

DARING BAKERS CHALLENGE #3

Feb 28, 2010

The February 2010 Daring Bakers’ challenge was hosted by Aparna of My Diverse Kitchen and Deeba of Passionate About Baking. They chose Tiramisu as the challenge for the month. Their challenge recipe is based on recipes from The Washington Post, Cordon Bleu at Home and Baking Obsession.


Tiramisu this month.

MY GOD, what a bloody headache.

For February it was decided that the Daring Bakers would make a tiramisu completely from scratch. and when I say completely, I mean COMPLETELY. And baby it was a LOOOOOOOOOOOOG process too, make no mistake about that.Well, ok. It wasn't really that long. The length of the instructions scared me. Truth is, it's really quite a straight forward recipe, you just need to do a little advance planning and it comes together fine. So with a deep breath, I hankered down and read the recipe over several times.

Ok, maybe not several.
15 times
10 times
5 tim
once.
but it was a very thorough reading!!

Ok, maybe not.


I started with the cheese first. I read that the recipe required me to use a cheesecloth (and NO, ok? I DID NOT see that alternative cotton handkerchief option) So, wondering where on earth I would find some muslin cloth (a.k.a cheesecloth) I approached my darling mother.
Me: Ma, I need cheesecloth for this month's challenge.
Ma: Cheesecloth?
Me: Cheesecloth.
Ma: But.....why?
Me: My sadistic loving hosts want me to make my own marscapone cheese.
Ma: MAKE YOUR ON CHEESE?????
Me: Make my own cheese.
Ma: Can't we cheat and buy you a tub from Jaya33?
Me: What a splendid idea NO MA. Why don't we go now so we can pick up a pirated version of Avatar too? BAKER'S HONOUR!! I HAVE to do each part of the challenge FROM SCRATCH!!
Ma: *sigh* ok........ *light bulb flashes above head* Why don't you use one of your father's vaeshttis*?

And so it came to be that I would be making cheese with garment which dad usually reserves for going to temple. Gave it a good wash and ripped  cut it into managable pieces.

Of course dad protested. It's just that, we don't listen to him much. ;-) (LOVE YOU DADA!!)
So far so good, it was getting quite exciting now too.
Of course, things are never really straight forward with me, now are they?
In my haste to make the cheese, I ignored the first golden rule of Bakingdom. You know, the one printed in bold and written in CAPITALS that's right 
on top, triple underlined and surrounded by flashing neon coloured arrows?

READ THE INSTRUCTIONS FIRST.

Oh woe is me. Ignorant fool that I am, I lined a BOWL (instead of a sieve) with ONE layer of cheesecloth ( instead of 3). Good thing mum stopped me in time. Otherwise I would've had a mouldy, watery bit of creamy goo. Thankfully, the rest of the cheese making saga went well, And I had a lovely lump of wonderfully smooth marscapone.


After making the cheese I proceeded to promptly fall in love.
With the savoiardi biscuits.
These turned out NOTHING like my first attempt at making them. A little dense and a little moist but fluffy and spongy at the same time too. It had a lovely crunch on the outside, due to the sugar sprinkeled on before baking. They weren't even THAT eggy! I've always been a little afraid anything that smells really eggy since I encountered a raw egg during my early baking days...... but that's a story for another post.

The pastry cream and zabaliogne came together pretty easily. Ok, maybe not so much the pastry cream. I had to make a second batch cause the first came out lumpy ( high heat? BIG NONO). Anyways, I had all my components and proceeded to assemble them the next day. That went off without a glitch too!!

Then again.....not quite.

Inovative sentient being that I was, I thought it'd be cool to  mold the tiramisu in a chocolate dome which I would then cover with gold dust?

Pretty fancy, no? Yeap.
A pretty big pain-in-the-arse, yes? YOOOOOUUUUU BETCHA.

Nothing really went wrong with the tiramisu assembly, just the chocolate shell. I covered my metal bowl with cling wrap thinking it would make geting the tiramisu out easier.
BIG MISTAKE.
The clingwrap helped alright. But the chocolate got stuck in the folds of the plastic making it a PAIN to unmold. And it didn't come off completely too. Some plastic was still stuck in the chocolate shell . Everytime I tried to remove it, the shell started to crack so I had to leave it alone.I still covered it up with the gold and some cocoa powder.... but the plastic threat still lurked at the back of my mind. More so since dad decided to give some away to a friend of his which had 2 young boys in the family. I warned him, and the report that came back the next day only consisted of rave reviews so I suppose He wasn't given the plastic piece. Thank goodness.

All in all, this really was a huge challenge. I still like my tiramisu recipe better than this one ( I thought it was a wee bit too sweet for my liking), but I'm glad I completed it. I never though  would ever MAKE my own marscapone!! And I think i'll keep doing so, it's alot easier on the wallet and I know that it's peservative free. The savoiardi recipe has also become a new friend. I just made another batch and am wondering what to do with them.

And thus, another DB challenge was completed. If you want to try the recipe out for yourself, you can follow this link. =>  http://thedaringkitchen.com/recipe/tiramisu

Happy Baking!!

oh, and p.s- I'VE STARTED CLASSES AT MIB!! ;-D

* http://en.wikipedia.org/wiki/Veshti#Styles_and_varieties

Happy Belated Valentines

Feb 18, 2010

 
 I don't think anyone could've said it better than a darling friend of mine :
Happy Valentine's Day Sayangs.
Whether you've got a special someone or you're singeling it up (that's the way),
I love you.
Believe in Vday or not, have a great day.

Quite frankly, I'm not quite sure what I feel about Valentines Day. 
And I don't quite care either.
All I know is that,
my dad still tries to sneak in roses every year,
my mum ALWAYS knows that the roses are coming,
and she acts surprised anyways.
We'll ALWAYS put those roses in either the blue porcelain or clear crystal glass,
and they'll ALWAYS be put on the same table,
after which,
they'll ALWAYS become manure for my dad's garden.

romantic, isn't it?


Anyways, in the spirit of the season I decided to make a cheesecake. The recipe comes from one of the previous Daring Bakers's challenges Abbey's Infamous Cheesecake.

I made a shortbread base, covered it with mandarin oranges and covered it with a 1/3 recipe of the cheese filling. The cake was baked in my ADORABLE 6-inch loose bottom tin and it turned out WONDERFULLY. The top is decorated with a bit of leftover strawberry coulis (a.k.a. fancy name for SAUCE) I had in the fridge.

Base :
~25 g cornflour ~75g all purpose flour ~2 tbsp ground almonds
~1 tbsp icing sugar ~50 g butter

Filling :
~ 3 sticks of cream cheese, 8 oz each (total of 24 oz) room temperature
~1 cup / 210 g sugar ~3 large eggs ~1 cup / 8 oz heavy cream
~1 tbsp. lemon juice ~1 tbsp. vanilla extract ~1 tbsp liqueur, optional, but choose what will work well with your cheesecake

also

~segments of 1 mandarin orange, rind and seeds cut away

Strawberry Coulis :
~300g strawberries ~2 tbsp castor sugar ~Juice of 1/2 a lemon ~4 tbsp water

*Again, I only used 1/3 of the recipe for the filling, but my tin was 6 inches in diameter, so it was just right.

Base:
Mix the dry ingredients together and cut in the softened butter. Use hands to squish together into a crumbly ball of dough. Flaten into base of cake tin. Bake in 180'C oven for 20 minutes or until golden brown. Take out and set aside to COOL COMPLETELY.

Filling:
Beat cream cheese and sugar together till smooth. Stir eggs in one at a time, being carefull not to incorperate too much air by overbeating. Fold in cream, lemon juice, extract, and if desired liquor.
DO NOT POUR INTO THE TIN YET!!!!!!!!

Coulis:
*If you're going to use this, it'd be a good ida to prepare it first. And really, it takes minimal effort on your part.

Clean and quarter the strawberries. Place all ingredients into a saucepan and stir to combine. Turn on the heat and let simmer, stirring often. When done, all the strawberries would have broken down. Let cool then push coulis through a sieve to remove seeds.

Cheesecake:
Preheat the oven to 180'C
Ok, so you have your base in the tin,but your cheesecake filling is still IN IT'S BOWL. Before you want to pour it into the tin, you want to cover the out side of the tin with tin foil to make it waterproof. Tear a piece of tinfoil that's TWICE the size of your tin. Fold it in half and use it to wrap the outside of your cheesecake tin. Make sure it's nice and secure with no holes showing through.
(What's all the fuss about making it water-tight? Well, we're going to be baking this in a water bath, but we'll get to that later.)

Tin is covered with tinfoil?
Check.
Tin is waterproof?
Check.
No holes peeping through?
None.

Ok, NOW you pour in the filling.You can use the coulis to decorate the cheesecake like I've done by putting blobs of the sauce on the top of the cake and using a toothpick to draw designs. Or not. Whatever you fancy really.
Ok, you're almost there. Take another sheet of tinfoil and cover the top of the tin. this is so your cake doesn't burn. Place the cheesecake tin into ANOTHER bigger tin. Place this HALFWAY into the oven. And finally, (and this is the LAST tricky bit. Promise.)  pour HOT water into the bigger tin until the level of water is about 1 inch high.
Alright, I might have lied a little about the tricky bit being over, cause finding out when the cheesecake is done is another fiddle all on it's own. Bake the cake for about 45-50 minutes. You won't be able to see when it's done because of the foil, but take it out and check at the 40 minute mark. You want it to be just set, but still jiggly in the centre.
Don't worry, it's not rocket science.
Just one thing to remember.
DON'T POKE YOUR CAKE.
It's pointless plus it'll make it crack.
When done baking, turn off the oven and let the cake cool in there so it doesn't crack. Take it out and put it in the fridge overnight.
Wake up in the morning and have a slice for breakfast. Screw the diet! You deserve it.

Happy Belated Valentines Day.

French lessons.

Jan 30, 2010

image courtesy of photoblog

Hi everyone, I'm looking for a french teacher who'll offer beginners lessons in the PJ area. Any ideas? Leave a comment please!
:-)


DARING BAKERS CHALLENGE #2

Jan 27, 2010

The January 2010 Daring Bakers’ challenge was hosted by Lauren of Celiac Teen. Lauren chose Gluten-Free Graham Wafers and Nanaimo Bars as the challenge for the month. The sources she based her recipe on are 101 Cookbooks and www.nanaimo.ca.


Oh boy... If it weren't for daring bakers I'm not sure I'd be posting at all! Atleast, I'm on time this time round right? :D

So.....Nanaimo.

I've officially gotten a friend's brother to completely fall in love with these bars. They really are quite addictive, I couldn't
stop at one myself. The challenge came at just the right time too, it gave me an opportunity to bring something a little different to my upcoming MAAN reunion. The guine- I mean, my friends seemed to really like them. Not something I'd make often, but it's a good recipe to have on hand for times you have to bring something to a pot luck party.

This months challenge consisted of 2 mandatory parts:
1) Make Graham crackers using the recipe provided.
2) Using the graham crackers, make the Nanaimo bar.

The challenge was hosted by Lauren of who has Celiac Disease. This means that she has a gluten intolerance. Her body can't digest gluten, meaning she can't eat anything with wheat in it.
Which basically rules out most pastas, breads, and commercially made foods...like KitKat.
Can you imagine not being able to eat KITKAT?
Life's tough for her, but that's what her blog's about.
It's about her finding a way to live with Celiac, and still keep eating great tasting food.
Following that vein, she thought she'd try to teach us DB people how to work it Gluten free. It was an option for us to make our graham crackers without gluten.
As much as I would've like to give that a crack, the flours ALONE would have eaten up my baking budget (which is a wee bit tighter than it used to be,now that SPM is over :-/ ) so I opted out for the gluten infested version.

Not that that made the cracker dough any easier to work with.
Bloody sticky difficult little bastard. I had dough under my nails, on my wrist, on my freakin' EYELID ok?
NOT pleasant.
In the end I just rolled it out between sheets of plastic and stuck it in the freezer overnight. That way it hardened up, and I could just plonk it on the baking sheet and be done with it. So elated was I at this seemingly stroke of genius, I forgot to take pictures of the baked crakers.
Nevermind, they weren't exactly the prettiest of things. But they tasted DAMN good. I had plenty of leftovers with the full recipe, so some I made into a cheesecake crust.
The rest I ate.
Smothered in chocolate ganache.
While watching Gordon Ramsey swear.
oh baby yeeeesss.

So, having made my crackers, it was time to move onto making the actual bars.
And of course, these provided their own fair share of drama.

The base is made by melting cocoa, butter and sugar over a double boiler, after which stirring in an egg to thicken it up.
Well, it was late, and I was tired so I thought to myself
"Double Boiler? At this time of night? pshaw... I don't need that. I'll just use the regular stove top."
Where?
Where were my God given brains when I made this decision?
Probably still thinking about Gordon Ramsey swearing.

Alright, so everything was going fine, until I added the egg.
Holy Mother of Cupcakes.
I've never seen anything clump so fast.

Imagine if you will, semi-solid brown objects, floating in a watery brown liquid.
My heart nearly stopped at the sight of this diarrhea reminiscent deluge, and for a full minute,
I whisked like a woman possessed.
Thank the powers that be, that just as my arm was about to give out it all came together in a beautifully smooth paste.
Which just goes to show really.
When life gives you crap, work hard and eventually it'll look good. :-)

So I thought that my troubles were over, and blissfully went about with the rest of the recipe.

Then came the middle layer. I put in one cup of sugar instead of 2 and added a teaspoon of vanilla to the original recipe, since people were saying in the forums that the middle layer was too sweet.
First time I made it, it looked curdled. I mean, REALLY curdled.But it was really late, so I just spread it on the base, crossed my fingers and hoped for the best. I took it out of the fridge the next day to check, and it looked EVEN WORSE.
So with a sigh, I proceded to scrape off the layer and start again. Same recipe, just using my electric mixer this time round. With caffeine buzzing through my system, I began to beat the buttercream again.
with a vengence.
and it still curdelled.
I swore.
LOUDLY.
And with the fury of a girl under pressure I increased the mixer speed.
And it was fine.
I'd insert another bowel dysfunction metaphor here, but I'm running out of ideas.


Infact, i think I can safely say that this could become one of my favourite buttercream recipe. It comes out soo smooth and buttery, a bit grainy, but we can't help that.
Stupid icing sugar.
At any rate, the rest of the recipe went off without a glitch
(A BIG SHOUTOUT TO MY LOVELY
SULEKHA CAMILLE SIVAPATHAM
FOR ASSISITING ME WITH THE FINAL CHOCOLATE LAYER.)

and it was a hit at the reunion.

Another DB challenge completed.
Delicious.


Pleased as PIE.

Jan 13, 2010


A boy doesn't have to go to war to be a hero; he can say he doesn't like pie when he sees there isn't enough to go around.
Edgar Watson Howe

There's something special about pulling a pie out of the oven.

Nothing can make you feel more deliciously competent and Domestic Goddess-y (or God-y) than pulling a well done pie out of the oven. And the beauty of this is that they're actually quite easy to make.There's not enough work involved for you to scream "AH, F*** IT!", but there's enough so you feel like you've accomplished something worthwhile.
I made this double crust apple pie a few days ago for my mum. Quite frankly, I don't really like apple pie, but my mum ADORES it. It reminds her of when she was studying nursing in England. She eats it the same way she used to all those years ago; a big wodge smothered in Birds custard. Before this, I've made little apple crumble pie-lets, but keeping in the spirit of 2010 I thought it was about time I attempted a double crust pie.

Not to say I was ever scared of making one.
Just...a little wary.

Ok, ok.... I used to be scared stiff.

I mean, you pour a WET fruit filling over a UNBAKED dough and you cover the whole lot with some more UNBAKED dough. Doesn't that just scream soggy and undercooked for you? Not to mention my demon oven (which I love to bits, no doubt) has a nasty habit of burning things.

Now, this is NOT me.I can already hear you thinking "a craftsman shouldn't blame his tools for shoddy work"
But this is NOT my fault.
Seriously.
I've timed things to the very second.
I've shifted the oven racks around to make sure the pan isn't too close to the baking coil.
I've CONSIDERABLY lower the temperature in any recipe I attempt.
My *darling* oven still burns things.
It's because of this 'tendency' that I often can't honestly give timing and temperature values in my recipes. My oven forces me to perform jazz-like improvisations on oven temperatures and timings every time I bake something, be it cake or bread. Often, I've only been able to get away with things because it only burns the top (so I can easily slice off the top and hide it under something.)
But this is different.
A pie needs to be just done top AND bottom.
But what was I to do? It was one of my New Year resolutions to make a double crusted pie, so either way I would at least have to make an attempt. I used Better homes and Gardens Oil pastry and winged the filling on my own. I must say, everything was going fine up till the baking part. I immediately got nervous as to my oven's little arsonistic habit. Not to mention, I'd run out of aluminum foil to cover the top with for the first 10 minutes of baking. So, as usual, I improvised.
~I baked it for 10 minutes with the heat only on the bottom at 220'C.
~Turned the heat down to 170'C and baked for 30 minutes with the heat on top and bottom.
~Bake for another 10 minutes at 170'C with heat only on bottom.

Sure it was a 'little fiddly', but the pie turned out FANTASTIC. Don't be scared away by the oven timing. I'll list the baking time and temperature according to the original recipe because I'm sure that your oven isn't as menopousal as mine. And really, it's a very satisfiying experience. And boys love girls who make them pie. ;-) (same concept applies the other way round of course)


Double-Crust Apple Pie (makes one 9 inch pie)

Oil Pastry
~2 1/4 cups all purpose flour
~ 1/4 tsp salt
~1/2 cup cooking oil
~1/3 cup cold milk.

Filling
~ 1/2 cup loosely packed brown sugar.
~ Juice of 1/2 an orange
~ 1 1/2 tsp allspice
~ pinch of salt
~ 1 tbsp flour
~ 4 cups worth of thinly sliced apples*
~ 1 cup raisins.

~9 inch pie plate

*I used 2 granny smiths and 2 gala apples. Not traditional, but you work with whatcha got.

The pastry is REALLY EASY.
All you have to do is measure out the flour and salt into a large bowl. Then, get your measuring cup, and measure out the oil FIRST. That way, you can measure out the milk in the same cup. Don't mix the liquids together, just pour it all into the bowl with the flour and salt. Mix with your hands, but don't overwork the mixture. When everything is combined, divide the dough into 2 balls, one slightly smaller that the other (that'll be the top of the pie) and put into the fridge to relax while you get on with the filling.

In a smaller bowl, mix everything except the fruit together until well combined. Toss the fruits into the mixture until completely smothered in the spiced liquid. I used jumbo raisins, so i had to chop them up a little, but the regular sized ones will be ok whole.

Preheat your oven to 220'C

Take the bigger ball of dough from the fridge and roll out into a circle slightly larger than the pie plate. The dough is quite soft, so your going to want to roll it out between two sheets of baking paper or plastic. take off the top sheet of paper or plastic and loosely drape the dough over the rolling pin. Unroll the pastry over your pie plate (the side with the other sheet of paper/plastic should be facing up). Remove the paper/plastic and ease the pastry into the pie plate. Cut away the excess. DON'T PRICK THE BOTTOM.

Pour the filling into the pie shell and smooth it out. Repeat the rolling out process with the secound ball of dough and drape that on top of the filling.Cut off the excess and seal the pastry around the edge of the pie, crimping as desired. Cut 8 slits in the top pastry to allow steam to escape.

Cover the edge of the pie with aluminium foil and bake for 10 minutes.
After 10 minutes, turn temperature down to 175'C and remove foil. Bake for another 30-35 minutes.
Cool on wire rack for an hour, then cut and serve. Mum likes hers with custard, and I like it with fresh cream.

:-)